
If you own a JBL Clip 3 speaker, it’s important to keep it clean to ensure optimal performance and longevity. Regular cleaning not only helps maintain the appearance of your speaker but also prevents dirt and grime buildup that can affect sound quality. In this guide, we will walk you through the step-by-step process of cleaning your JBL Clip 3 speaker, from understanding its key features to post-cleaning care.
Understanding Your JBL Clip 3 Speaker
Before diving into the cleaning process, it’s essential to familiarize yourself with the key features of the JBL Clip 3. This portable Bluetooth speaker is known for its compact size and powerful sound. It features a built-in carabiner, allowing you to easily clip it onto your bag or clothing for on-the-go use. The Clip 3 also boasts a durable and waterproof design, making it suitable for various outdoor activities.
Key Features of the JBL Clip 3
Let’s take a closer look at some of the standout features of the JBL Clip 3:
- Compact and portable size
- Built-in carabiner for easy transportation
- Waterproof design
- Rich and powerful sound quality
- Long-lasting battery life
Importance of Regular Cleaning
Maintaining a clean JBL Clip 3 speaker is vital for several reasons. Firstly, regular cleaning helps remove dust, dirt, and debris that may accumulate on the exterior surfaces of the speaker. This buildup can potentially affect the sound quality and appearance of your device. Additionally, a clean speaker ensures that you can fully enjoy the rich and powerful sound that the JBL Clip 3 is known for.
When cleaning your JBL Clip 3, it’s important to pay attention to the various parts of the speaker. Start by wiping down the exterior surfaces with a soft, lint-free cloth. This will help remove any dust or smudges that may have accumulated. For more stubborn stains or dirt, you can lightly dampen the cloth with water or use a mild cleaning solution specifically designed for electronics.
Next, take a closer look at the built-in carabiner. Over time, dirt and debris can get trapped in the mechanism, making it difficult to open or close. To clean the carabiner, use a small brush or toothbrush to gently remove any dirt or debris. Be careful not to apply too much force, as this may damage the carabiner.
In addition to the exterior cleaning, it’s also important to clean the speaker grille. The grille is the protective cover that sits over the speaker drivers. Over time, dust and debris can accumulate on the grille, affecting the sound quality. To clean the grille, use a soft brush or compressed air to gently remove any dust or debris. Avoid using excessive force, as this may damage the delicate speaker drivers.
Lastly, don’t forget to clean the charging port and any other ports or buttons on the speaker. These areas can also accumulate dust and debris, which may affect the functionality of your JBL Clip 3. Use a soft brush or compressed air to gently remove any dirt or debris from these areas.
Maintaining a clean JBL Clip 3 is not only important for its performance but also for your health and safety. Regular cleaning helps prevent the growth of bacteria and germs, especially if you frequently take your speaker outdoors or share it with others. By keeping your JBL Clip 3 clean, you can enjoy your music with peace of mind.
Remember, proper cleaning and care can contribute to the longevity of your JBL Clip 3. By following these cleaning tips and regularly maintaining your speaker, you can ensure that it continues to perform at its best over time.
Gathering the Right Cleaning Materials
Before getting started with the cleaning process, gather the necessary materials to ensure a thorough and safe cleaning experience. Here are some essential items you will need:
Safe Cleaning Solutions for Electronics
To clean your JBL Clip 3 speaker effectively, it’s important to use safe cleaning solutions that are suitable for electronic devices. Avoid using harsh chemicals or abrasive cleaners, as they can potentially damage the speaker’s exterior or internal components. Instead, opt for gentle cleaning solutions such as mild soap diluted in water or electronic device cleaning wipes specifically designed for cleaning electronics.
When choosing a cleaning solution, it’s crucial to consider the type of material used in the construction of your speaker. Different materials may require different cleaning methods. For example, if your JBL Clip 3 speaker has a fabric covering, you may want to use a fabric cleaner specifically formulated for electronics to remove any dirt or stains without causing any damage.
It’s also important to note that using excessive amounts of cleaning solution can be detrimental to your speaker. Be sure to follow the manufacturer’s instructions and use only the recommended amount of cleaning solution to avoid any potential damage.
Tools for Effective Cleaning
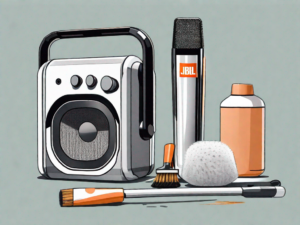
In addition to safe cleaning solutions, you may need the following tools for effective cleaning:
- Soft microfiber cloth: A soft microfiber cloth is an essential tool for cleaning electronic devices. Its fine fibers are gentle on surfaces and help to remove dust, fingerprints, and smudges without scratching or leaving lint behind.
- Cotton swabs: Cotton swabs are useful for reaching small and intricate areas of your JBL Clip 3 speaker that may be difficult to clean with a cloth. They can be used to gently remove dirt or grime from crevices, buttons, or speaker grilles.
- Compressed air canister: A compressed air canister is an effective tool for removing dust or debris from hard-to-reach areas of your speaker. It can be used to blow away dust from speaker grilles, ports, or any other small openings.
When using a compressed air canister, it’s important to hold the canister upright and use short bursts of air to prevent any liquid from escaping. This will help to ensure a safe and efficient cleaning process.
Remember, having the right tools and cleaning materials is essential for maintaining the cleanliness and longevity of your JBL Clip 3 speaker. By using safe cleaning solutions and the appropriate tools, you can effectively remove dirt, dust, and grime without causing any damage to your electronic device.
Pre-Cleaning Preparations
Before diving into the cleaning process, there are a few essential pre-cleaning preparations to ensure a successful and safe cleaning session.
When it comes to cleaning your beloved JBL Clip 3 speaker, taking the necessary precautions is of utmost importance. Not only will these preparations help you achieve a sparkling clean device, but they will also safeguard your speaker from any potential harm.
Powering Down Your Speaker
Before cleaning your JBL Clip 3, make sure to power it down and disconnect it from any power sources or devices. This step is crucial to avoid any potential electrical hazards and to protect your speaker from accidental damage during the cleaning process.
Imagine this: you’re excitedly preparing to clean your speaker, but you forget to turn it off before starting. As you begin wiping away the dust and grime, you accidentally press a button, causing the speaker to blast a deafening sound that startles you and everyone around. By powering down your speaker, you eliminate the risk of such unexpected surprises and ensure a peaceful cleaning experience.
Removing Attachments and Accessories
If your JBL Clip 3 speaker has any attachments or accessories, such as charging cables or audio cords, detach them before proceeding with the cleaning. This will ensure that you can clean all the nooks and crannies of your speaker thoroughly.
Attachments and accessories can often accumulate dirt and dust over time, especially if they are frequently exposed to the elements. By removing these additional components, you create a clear path to effectively clean every inch of your speaker. Plus, it gives you the opportunity to inspect these accessories for any signs of wear and tear, ensuring they remain in top-notch condition for future use.
As you carefully detach the charging cable, you may notice a small speck of dust nestled in the crevices of the connector. With a gentle swipe of a microfiber cloth, you swiftly remove the unwanted particle, leaving your cable pristine and ready for its next charging session.
Step-by-Step Cleaning Process
Now that you’re ready to clean your JBL Clip 3 speaker, let’s dive into the step-by-step cleaning process.
Cleaning your speaker regularly not only helps maintain its appearance but also ensures optimal sound quality. Follow these detailed instructions to keep your JBL Clip 3 in top shape.
Cleaning the Exterior
Start by dampening a soft microfiber cloth with the mild soap solution or electronic cleaning wipes. It’s important to use a mild soap solution or electronic cleaning wipes specifically designed for electronic devices to avoid any potential damage. Gently wipe the exterior surfaces of your JBL Clip 3, including the top, sides, and bottom. Pay close attention to any visible dirt or smudges, ensuring that you cover all areas. By thoroughly cleaning the exterior, you not only remove dirt but also prevent it from entering the speaker’s openings, which can affect its performance.
If necessary, you can use a cotton swab dipped in the cleaning solution to clean hard-to-reach areas or tight spaces, such as the speaker grill or buttons. Be gentle to avoid causing any damage to these sensitive parts. Taking the time to clean these areas ensures that your speaker remains in optimal condition.
Cleaning the Speaker Grill
The speaker grill is one area that often collects dust and debris, potentially impacting sound quality. To clean the speaker grill, use a clean, dry toothbrush or a soft-bristled brush. Gently brush the grill in a circular motion to loosen any dirt or particles. By using a circular motion, you ensure that you cover the entire surface area of the grill, effectively removing any accumulated debris.
Once you’ve loosened the debris, use a canister of compressed air to blow away the loosened particles. Be sure to hold the canister a few inches away from the speaker to avoid causing any damage. The compressed air effectively removes any remaining dirt or particles, leaving your speaker grill clean and clear.
Drying Your Speaker
After cleaning, allow your JBL Clip 3 speaker to air dry completely before reconnecting any accessories or powering it back on. It’s essential to ensure that your speaker is completely dry to prevent any potential damage. Do not apply heat or direct sunlight to expedite the drying process, as this can potentially damage your speaker. Instead, find a well-ventilated area and let your speaker air dry naturally. This ensures that all moisture evaporates, leaving your speaker ready for use.
By following these step-by-step cleaning instructions, you can maintain the performance and appearance of your JBL Clip 3 speaker. Regular cleaning not only extends the lifespan of your speaker but also ensures that you enjoy high-quality sound for years to come.
Post-Cleaning Care
Now that you’ve successfully cleaned your JBL Clip 3 speaker, it’s important to take some post-cleaning care steps to ensure its longevity.
Reassembling Your Speaker
Once your speaker is thoroughly dry, reattach any accessories or attachments that you removed earlier. Ensure that they are securely connected to the speaker.
Proper Storage for Longevity
When storing your JBL Clip 3 speaker, make sure to keep it in a cool, dry place away from direct sunlight or extreme temperatures. This will help preserve its performance and prevent any potential damage caused by environmental factors.
By following these cleaning and care instructions, you can keep your JBL Clip 3 speaker in top condition for years to come. Remember to clean your speaker regularly to maintain its performance and enjoy your favorite tunes with optimal sound quality.