
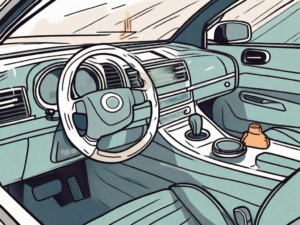
Sticky car buttons can be a frustrating issue to deal with. Not only can they affect the overall functionality of your car’s interior, but they can also be unsightly and diminish the overall aesthetic appeal. If you’re struggling with sticky car buttons, don’t worry – there are simple and effective ways to clean them. In this article, we will explore the causes of sticky car buttons, precautions to take before cleaning, essential tools and cleaning solutions, a step-by-step guide to cleaning, and tips for maintaining your car buttons after cleaning.
Understanding the Causes of Sticky Car Buttons
Before we delve into the cleaning process, it’s important to understand the common causes of sticky car buttons. By identifying the underlying factors, you can take appropriate measures to prevent further stickiness. There are two main culprits behind sticky car buttons: common substances and weather conditions.
Common Substances That Make Car Buttons Sticky
One of the leading causes of sticky car buttons is the accumulation of substances like spilled liquids, food crumbs, and dirt. Over time, these substances can seep into the crevices of your buttons and create a sticky residue. Imagine a scenario where you accidentally spill your morning coffee on the center console of your car. The hot liquid seeps into the buttons, leaving behind a sticky mess. As you continue to use the buttons, the residue attracts more dirt and grime, exacerbating the stickiness. It’s essential to remove these substances to restore the smooth operation of your car buttons.
When it comes to food crumbs, they can easily find their way into the nooks and crannies of your car’s buttons. Whether it’s snacking on the go or a quick bite during a road trip, it’s common for small food particles to fall onto the buttons. Over time, these crumbs can accumulate and mix with other substances, creating a sticky and unhygienic environment. Regular cleaning and maintenance can help prevent this issue.
The Impact of Weather Conditions on Car Buttons
Weather conditions can also play a significant role in making car buttons sticky. High humidity levels or prolonged exposure to extreme heat can cause the interior of your car to become sticky. Imagine a hot summer day where the temperature inside your car reaches scorching levels. The heat can melt certain materials, resulting in a sticky residue on the buttons. Additionally, high humidity levels can create a damp environment, promoting the growth of mold and mildew. This can further contribute to the stickiness of your car buttons. Understanding the impact of weather conditions can help you take preventive measures.
To combat the effects of high humidity, consider using a dehumidifier in your car or parking it in a shaded area. This will help reduce the moisture levels inside your vehicle, preventing the growth of mold and mildew. When it comes to extreme heat, parking your car in a covered area or using sunshades can help minimize the temperature rise inside your vehicle. Taking these preventive measures can go a long way in maintaining the functionality of your car buttons.
Precautions to Take Before Cleaning Sticky Car Buttons
Prior to cleaning your car buttons, there are a few precautions you should take to ensure safety and protect your car’s interior:
Safety Measures to Consider
First and foremost, ensure that your car is turned off and the keys are removed from the ignition. This prevents any accidental activation of the buttons while cleaning. Additionally, wearing gloves can protect your hands from any harsh cleaning chemicals you may use during the process.
When it comes to safety, it’s important to remember that different car models may have different button designs. Some buttons may be more sensitive than others, so it’s crucial to handle them with care. Take the time to familiarize yourself with the specific buttons in your car and their functions before proceeding with the cleaning process.
Furthermore, if you are unsure about the appropriate cleaning method or if the buttons are particularly sticky or damaged, it is advisable to consult a professional car detailer or seek guidance from your car’s manufacturer.
Protecting Your Car’s Interior During Cleaning
It’s also important to protect your car’s interior while cleaning the buttons. Place a cloth or towel over the surrounding area to catch any drips or debris that may fall during the cleaning process. This will prevent any potential damage or staining on your car’s upholstery or surfaces.
Moreover, before you begin cleaning, it’s a good idea to vacuum the surrounding area to remove any loose dirt or debris. This will prevent particles from getting trapped under the buttons or causing further stickiness.
When selecting a cleaning solution, opt for products that are specifically designed for car interiors. Avoid using harsh chemicals or abrasive cleaners, as they can damage the buttons or the surrounding surfaces. Instead, look for gentle, non-abrasive cleaners that are safe for use on plastic or vinyl.
When applying the cleaning solution, use a soft microfiber cloth or a cotton swab to gently wipe the buttons. Avoid using excessive force or scrubbing motions, as this can lead to further damage or wear on the buttons.
After cleaning, make sure to thoroughly dry the buttons to prevent any moisture from seeping into the electrical components. Use a clean, dry cloth to remove any excess moisture and allow the buttons to air dry completely before turning your car back on.
By following these precautions and taking the time to clean your car buttons properly, you can maintain their functionality and keep your car’s interior looking clean and well-maintained.
Essential Tools and Cleaning Solutions for Sticky Car Buttons
Now that you’re prepared to clean your car buttons, it’s time to gather the necessary tools and cleaning solutions. When it comes to cleaning sticky car buttons, you have the option of using homemade or store-bought cleaning solutions. Each has its pros and cons.
Homemade vs. Store-Bought Cleaning Solutions
If you prefer a DIY approach, you can create a cleaning solution using common household ingredients such as vinegar, water, and mild soap. Vinegar is known for its natural cleaning properties and can effectively remove dirt and grime from car buttons. Mix equal parts vinegar and water in a spray bottle, and add a few drops of mild soap for extra cleaning power. Shake the bottle well to ensure the ingredients are thoroughly combined.
On the other hand, if you prefer the convenience of ready-to-use products, there are various store-bought cleaning solutions specifically formulated for car interiors. These solutions often contain specialized ingredients that can effectively dissolve sticky residue and leave your car buttons looking and feeling clean. Look for products that are safe to use on different types of surfaces, such as plastic, rubber, or metal, to avoid any potential damage.
When choosing between homemade and store-bought cleaning solutions, consider factors such as cost, availability, and personal preference. Homemade solutions are generally more cost-effective and can be easily made with ingredients you may already have at home. Store-bought solutions, on the other hand, offer convenience and may have additional features, such as pleasant scents or antibacterial properties.
The Role of Different Cleaning Tools
In addition to cleaning solutions, you’ll need the right tools to effectively clean your car buttons. Soft microfiber cloths are ideal for wiping away dirt and residue without causing scratches. The fine fibers of microfiber cloths attract and trap dirt particles, ensuring a thorough clean. When using a microfiber cloth, fold it into a small square to create a cushioned surface that can easily reach into crevices and corners.
For hard-to-reach areas and narrow gaps between buttons, Q-tips or soft-bristled toothbrushes can be incredibly useful. These small, precision tools allow you to target specific spots and remove stubborn dirt or grime. Gently dip the Q-tip or toothbrush in your chosen cleaning solution and carefully scrub the affected areas. Be cautious not to apply excessive pressure to avoid damaging the buttons or surrounding surfaces.
When using any cleaning tools, it’s important to be mindful of the materials your car buttons are made of. Some buttons may have a protective coating or delicate surface that can be easily scratched or damaged. Always refer to the manufacturer’s instructions or consult a professional if you’re unsure about the compatibility of certain cleaning tools with your car buttons.
By combining the right cleaning solutions and tools, you can effectively tackle sticky car buttons and restore them to their original functionality. Regular maintenance and cleaning will not only improve the appearance of your car’s interior but also ensure smooth operation of the buttons, enhancing your overall driving experience.
Step-by-Step Guide to Cleaning Sticky Car Buttons
Keeping your car’s buttons clean and free from stickiness is essential for a smooth driving experience. Sticky buttons can be frustrating and may affect the functionality of your car’s controls. To help you with this task, here is a detailed step-by-step guide on how to clean your sticky car buttons effectively.
Pre-Cleaning Steps
Before diving into the cleaning process, it’s important to take a few pre-cleaning steps to ensure the best results. Start by removing any visible debris or substances from your buttons. This can be done by gently wiping them with a soft cloth or using a can of compressed air to blow away loose dirt or dust particles. This initial step will make the cleaning process more effective and prevent any scratches that may occur during the cleaning process.
Detailed Cleaning Process
- Dampen a soft microfiber cloth with your chosen cleaning solution. It’s important to use a cleaning solution that is safe for the materials of your car’s buttons. Avoid using harsh chemicals that may cause damage.
- Gently wipe the sticky buttons using the damp cloth. Pay attention to the crevices and corners where residue may be more concentrated. Apply gentle pressure to remove the stickiness without damaging the buttons.
- If necessary, use a Q-tip or a soft-bristled toothbrush dipped in the cleaning solution to access hard-to-reach areas. The bristles of the toothbrush or the cotton tip of the Q-tip can help dislodge any stubborn residue. Be extra gentle when using these tools to avoid causing any damage to the buttons.
- Once you have thoroughly cleaned the buttons, use a clean, dry microfiber cloth to wipe away any remaining cleaning solution or moisture. This step is crucial to prevent any residue from attracting more dirt or dust, which can lead to stickiness in the future.
Cleaning your car’s buttons regularly is essential to maintain their functionality and prolong their lifespan. By following these simple steps, you can ensure that your car’s buttons are clean, smooth, and free from stickiness, providing you with a hassle-free driving experience.
Maintaining Your Car Buttons After Cleaning
Cleaning your car buttons is just the first step in ensuring their longevity and functionality. It’s important to establish a regular cleaning schedule and take preventive measures to avoid sticky buttons in the future.
Regular Cleaning Schedule
Set a routine for cleaning your car buttons to prevent the accumulation of dirt and residue. A regular cleaning schedule will help maintain their smooth operation and prevent sticky buildup. Depending on your usage and environmental factors, aim to clean the buttons at least once a month.
Preventive Measures to Avoid Sticky Buttons
To further prevent sticky car buttons, consider using button covers or protective films. These accessories can provide an extra layer of protection against spills, dust, and residue. Additionally, avoid eating or drinking inside your car to minimize the chances of spills and sticky substances coming into contact with the buttons.
By following these steps and taking the necessary precautions, you can easily and effectively clean sticky car buttons. Remember to always prioritize safety, choose the appropriate cleaning solutions and tools, and establish a maintenance routine. With properly maintained buttons, you will enjoy a smooth and hassle-free driving experience.