How To Clean A Sonos Sub
(Best Cleaning Method)
Sonos subwoofers are the top-of-the-line choice for adding dynamic bass to soundtracks and improving listening experiences.
Unfortunately, like most home sound system components, these subwoofers collect dirt and dust over time and need to be cleaned.
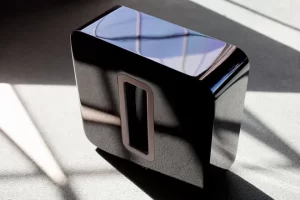
Luckily, whether you have the Sonos mini-sub or the full-sized gen 3, the cleaning technique discussed in this guide will teach you how to clean a Sonos sub properly, no matter the model.
How To Clean A Sonos Sub
Learning how to clean a Sonos sub is simple. The best way to clean the sub is to use compressed air to remove surface dust, sanitize the surface with isopropyl wipes, seal and protect the paint with a detail spray, and place the sub back in a clean area.
In the following steps, you will learn how to clean a Sonos subwoofer the right way.
What You Will Need:
Steps For Cleaning Sonos Sub:
1: Remove Dust From Surrounding Area
Depending on where the Sonos subwoofer is located, there may be a substantial amount of dust built up around where it sits.
To ensure that the sub will be placed back in a dust-free area when it is done being cleaned, this area must be cleaned first.
To begin, use a household vacuum, or this highly rated shark vacuum, to suck up any dirt or debris around where your subwoofer lives, whether it be a shelf, under a chair, in a cabinet, etc.
2: Remove Dust From the Sonos Subwoofer (No Contact)
Before you begin removing the dust, ensure you have a clean place to work. If you already do, continue reading.
The goal is to remove all the dust without rubbing it into the subwoofer’s paint, as it can scratch.
To remove dust from the subwoofer, spray the entire surface area with compressed air to remove as much as possible, with as little contact as possible.
Make sure to spray the black cones and voice coils that are visible to remove dust and improve sound quality.
3: Remove Dust From the Sonos Subwoofer (Contact)
After compressed air has been used to remove dust from the sub, it is safe to initiate a contact-based cleaning method.
Spray the entire exterior of the subwoofer with a soapy water solution, and wipe it down with a microfiber cloth.
At this stage 99% of the dust and dirt will be removed from the surface of the subwoofer, exposing large bits of dirt and grime that will be targeted next.
4: Sanitize the Sonos Subwoofer
Use 70% Isopropyl alcohol disinfectant wipes to wipe down the surface of the Sonos subwoofer.
This will cut through any grease that may be on the surface of the paint, as well as eliminate small smudges and scuffs.
If the paint on the Sonos is wet after this step, allow it to dry before moving on.
5: Seal and Protect Sonos Subwoofer Paint
To finish off the cleaning process, apply a quality detail spray to the surface of the subwoofer.
Rub the detail spray in small circular motions until the entire surface of the paint has been covered.
Detail sprays have small amounts of synthetic wax that will seal, protect, and restore the shine on your Sonos subwoofer.
6: Place Sonos Sub Back In Its Home
Congratulations, you have successfully cleaned your Sonos subwoofer. This will greatly improve the visual appearance, and potentially the sound quality.
Now that it is clean, place the subwoofer back in place so you can begin listening to its riveting base notes ASAP.
If you’re wondering how to position your Sonos subwoofer as best as possible, check out this guide:

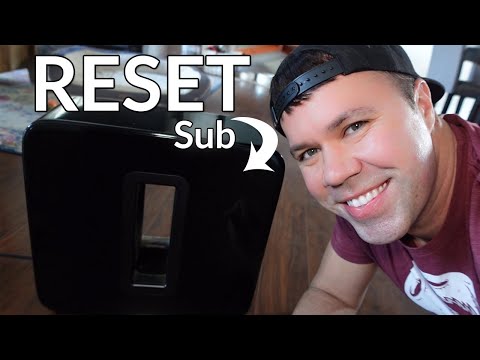
How To Reset Sonos Subwoofer
Sometimes resetting a Sonos sub is required when it is being linked to a new sound system or has not been used for an extended period of time.
Here’s how to reset a Sonos subwoofer:
1: Unplug the power cord on the Sonos subwoofer to begin
2: Press and hold the join button while you plug the power cord in again
- If this doesn’t work, press and hold the play/ pause or mute button while restoring power
3: After power is restored, continue holding the selected button until the connect light flashes orange and white
4: Once the light flashes green, the Sonos subwoofer is reset and is ready to reconnect
How To Connect Sonos Subwoofer
1: To begin, download the Sonos app available on both iOS and Android processing systems
2: In the settings tab from the dropdown menu, select system
3: Under the system tab, select the room you are setting the subwoofer up in
4: Tap “Add Subwoofer” and follow the prompts on the screen to finish Sonos subwoofer setup

How To Identify Sonos Subwoofer Generation
Over the years, Sonos has come out with a variety of subwoofer generations, all of which have been cutting edge in their respective periods.
However, if you have inherited a Sonos or are looking to purchase one, you may be wondering, “How do I tell which Sonos Sub I have?”
There are a few very simple ways to tell which Sonos subwoofer generation you are looking at.
Sonos Subwoofer Generation 1:
The Gen 1 subwoofer can easily be identified because it only comes in white and matte black colors, and has a silver center, as seen above.
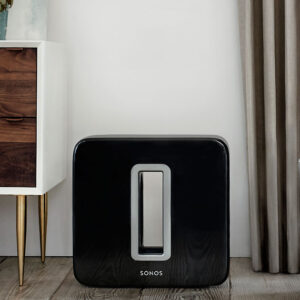
Sonos Subwoofer Generation 2:

The Gen 2 subwoofer at a first glance looks very similar to the Gen 1, however, this model only comes in Black and White with a black center, as seen above.
Sonos Sub Mini
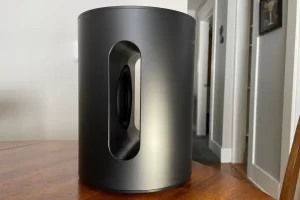
The Sonos Sub Mini is the easiest to identify because…well… believe it or not it is mini. This cylindrical subwoofer looks quite a bit different than the other models.