
Regular maintenance is essential for keeping your PS4 controller in optimal condition. Over time, dirt and grime can accumulate on the thumbsticks, affecting your gaming performance.
By understanding the importance of cleaning and following a step-by-step guide, you can extend the lifespan of your controller and improve your overall gaming experience. In this article, we will discuss the necessary tools and preparations, the detailed cleaning process, and the reassembly and testing of your PS4 controller.
Understanding the Importance of Regular Controller Maintenance
Dirt and grime may seem harmless, but they can significantly impact your gaming experience. The accumulation of debris on your PS4 controller thumbsticks can lead to stickiness, reduced responsiveness, and even the dreaded drift. By cleaning your controller regularly, you can avoid these issues and ensure smooth gameplay.
Regular controller maintenance is crucial for every gamer who wants to optimize their gaming experience. While it may seem like a trivial task, neglecting the cleanliness of your PS4 controller can have detrimental effects on your gameplay. The thumbsticks, being the primary interface between you and the game, are prone to attracting dirt and grime over time. Without proper maintenance, these contaminants can wreak havoc on your gaming performance.
The Impact of Dirt and Grime on Gaming Performance
A controller with dirty thumbsticks may exhibit input lag, unresponsive movements, or inconsistencies in gameplay. The dirt and grime interfere with the sensors that detect your thumb movements, leading to inaccuracies and frustration during gameplay.
Imagine being in the midst of an intense gaming session, fully immersed in the virtual world, only to find your character’s movements delayed or unresponsive. The frustration that arises from such experiences can quickly diminish the joy of gaming. This is where the significance of regular controller maintenance becomes evident. By keeping your thumbsticks clean and free from dirt and grime, you ensure that your inputs are accurately translated into the game, allowing for seamless and immersive gameplay.
Extending the Lifespan of Your PS4 Controller
Proper maintenance not only improves performance but also extends the lifespan of your PS4 controller. By removing dirt and debris, you prevent potential damage to the internal components, preserving the overall functionality of the controller for a longer period.
Every gamer knows the value of a reliable and durable controller. It becomes an extension of your gaming prowess, enabling you to execute precise movements and dominate the virtual battlefield. However, without regular maintenance, your controller’s lifespan can be significantly reduced. The accumulation of dirt and grime not only affects the performance but also poses a risk of damaging the internal mechanisms of the controller.
By taking the time to clean your PS4 controller regularly, you safeguard its longevity. The removal of dirt and debris prevents them from infiltrating the delicate circuitry and mechanisms within the controller. This, in turn, ensures that your controller remains in optimal condition, allowing you to enjoy countless hours of gaming without any unexpected malfunctions.
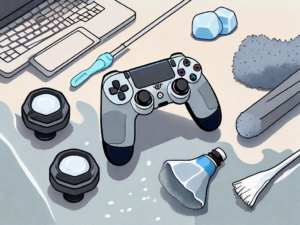
Identifying the Tools Needed for Cleaning
Before you begin the cleaning process, gather the necessary tools. Having the right tools at hand will ensure that you can effectively clean your PS4 controller and maintain its optimal functionality. Whether you choose to use household items or specialized cleaning tools designed for electronics, it’s important to have everything you need ready.
Household Items You Can Use
Using common household items can be a convenient and cost-effective way to clean your PS4 controller. These items are often readily available in your home and can provide excellent results. Here are some household items you can use:
- Soft Cloth: A soft cloth is essential for wiping away dust, dirt, and fingerprints from the surface of your controller. Make sure the cloth is clean and free of any abrasive materials that could potentially scratch the controller.
- Rubbing Alcohol or Mild Soap: To remove stubborn stains or grime, you can use rubbing alcohol or mild soap. Dampen a corner of the cloth with a small amount of rubbing alcohol or mild soap diluted in water. Gently wipe the affected areas, being careful not to saturate the controller with liquid.
- Cotton Swabs: Cotton swabs are perfect for reaching those hard-to-clean areas, such as the crevices around buttons and analog sticks. Dip a cotton swab in rubbing alcohol or mild soap solution and carefully clean these areas to ensure thorough cleanliness.
- Small Brush: A small brush, such as a soft-bristled toothbrush or a paintbrush, can be used to remove dust and debris from the controller’s crevices. Gently brush these areas to dislodge any particles and then wipe them away with a cloth.
By utilizing these household items, you can effectively clean your PS4 controller and restore its appearance and functionality.
Specialized Cleaning Tools for Electronics
If you prefer a more specialized approach, you can consider purchasing a controller cleaning kit. These kits are specifically designed for cleaning gaming controllers and offer targeted cleaning for intricate components. Here are some tools commonly found in controller cleaning kits:
- Cleaning Solutions: Controller cleaning kits often include specialized cleaning solutions that are safe to use on electronic devices. These solutions are formulated to remove dirt, oils, and grime without damaging the sensitive components of your PS4 controller.
- Microfiber Cloths: Microfiber cloths are ultra-soft and designed to effectively clean delicate surfaces without leaving scratches or lint behind. They are ideal for wiping down the entire controller and ensuring a streak-free finish.
- Precision Brushes: Cleaning kits may also include precision brushes with fine bristles. These brushes are perfect for reaching tiny crevices, such as the gaps between buttons or the edges of analog sticks, where dirt and debris tend to accumulate.
- Compressed Air: Compressed air can be used to blow away dust and debris from hard-to-reach areas of your PS4 controller. It provides a quick and efficient way to remove particles without the need for direct contact.
With these specialized tools, you can confidently clean your PS4 controller, knowing that you are using products specifically designed for electronic devices. These tools offer precision and convenience, ensuring that every nook and cranny of your controller is thoroughly cleaned.
Pre-Cleaning Preparations
Before diving into the cleaning process, it’s crucial to take some preparatory steps to ensure your safety and the protection of your PS4 controller.
Cleaning your PS4 controller not only helps maintain its functionality but also enhances your gaming experience. Over time, dirt, sweat, and debris can accumulate on the controller, affecting its performance and responsiveness. By following the proper cleaning procedures, you can restore your controller to its optimal condition.
Safety Measures to Consider
Make sure your PS4 console is turned off and unplugged. This precaution protects both you and the controller from potential damage. It is essential to disconnect the power source to avoid any electrical accidents during the cleaning process.
Furthermore, finding a well-lit and clean workspace is crucial to perform the cleaning process comfortably. A clutter-free area will allow you to focus on the task at hand and prevent any accidental mishaps. Consider using a clean, soft cloth to place your disassembled controller parts to avoid any scratches or damage.
Disassembling Your PS4 Controller
To access the thumbsticks for cleaning, you will need to disassemble your PS4 controller. Follow the manufacturer’s instructions or look for online tutorials specific to your controller model. Taking your time and being gentle during this step is vital to avoid any accidental damage to the controller’s internal components.
Before disassembling, it is recommended to take pictures or make notes of the controller’s original configuration. This precaution will help you reassemble the controller correctly after cleaning. Keep track of the screws and small parts you remove, ensuring they are safely stored and easily accessible for reassembly.
Once you have successfully disassembled your controller, you will have a better understanding of its internal structure. This knowledge can be fascinating, as you get a glimpse into the intricate design and engineering that goes into creating a gaming controller.
Remember, each component plays a crucial role in the controller’s functionality, from the buttons and triggers to the circuit board and battery. Take a moment to appreciate the craftsmanship and attention to detail that has gone into creating your PS4 controller.
Detailed Cleaning Process
Now that you have gathered the necessary tools and prepared your workspace, it’s time to dive into the detailed cleaning process.
Keeping your gaming controller clean is crucial for maintaining its performance and longevity. Regular cleaning not only helps to remove dirt and grime but also prevents the buildup of bacteria and germs.
Cleaning the Thumbsticks
Start by using a soft cloth or microfiber cloth to wipe away any visible dirt or debris from the thumbsticks. These small protrusions are the primary control points of your gaming experience, so it’s important to keep them clean and in good condition.
Next, dip a cotton swab into rubbing alcohol or a mild soap solution and gently clean the thumbstick surface. The rubbing alcohol helps to dissolve any grease or oil that may have accumulated on the thumbsticks, while the mild soap solution provides a gentle cleaning action without causing any damage.
Be cautious not to saturate the thumbsticks or allow any liquid to seep into the controller’s internals. Excessive moisture can lead to malfunctioning buttons or even permanent damage to the controller. Afterward, use a dry cloth to remove any residue and ensure that the thumbsticks are completely dry before using the controller again.
If the dirt is stubborn and cannot be removed with a cloth and cleaning solution, you may need to remove the thumbsticks for a more thorough cleaning. Refer to your controller’s manual or online resources for instructions on removing and cleaning individual components. Take care not to apply excessive force that could cause damage.
Cleaning the Controller Body
While focusing on the thumbsticks is essential, don’t neglect the rest of the controller. The controller body, including the buttons, triggers, and crevices, can also accumulate dirt and debris over time.
Use a small brush, such as a toothbrush with soft bristles, to gently remove any dirt or dust from the controller body. Pay particular attention to the crevices, buttons, and triggers, as these areas can be prone to collecting debris. A toothbrush with soft bristles is ideal as it can effectively dislodge dirt without scratching or damaging the controller’s surface.
After brushing away the dirt, wipe the controller surface with a clean cloth to complete the cleaning process. This final step helps to remove any remaining residue and leaves your controller looking fresh and ready for your next gaming session.
Remember, regular cleaning and maintenance of your gaming controller not only improves its appearance but also ensures optimal performance and extends its lifespan. By following these detailed cleaning steps, you can keep your controller in top shape and enjoy a seamless gaming experience every time.
Reassembling and Testing Your PS4 Controller
Now that your PS4 controller is freshly cleaned, it’s time to reassemble it and ensure everything is in working order before resuming your gaming adventures.
Steps to Reassemble Your Controller
Follow the manufacturer’s instructions or online tutorials to correctly reassemble your PS4 controller. Take your time and ensure that all components are securely in place. Avoid overtightening any screws or applying excessive pressure during reassembly.
Testing for Improved Performance
After reassembling your PS4 controller, it’s important to test it for improved performance. Connect your controller to your PS4 console and verify that the thumbsticks are responsive and move smoothly. Test the buttons, triggers, and other functionalities to ensure everything is working as expected. If you notice any issues, disassemble the controller again and double-check the cleaning process or seek professional assistance.
By following this step-by-step guide, you can effectively clean your PS4 controller thumbsticks and enhance your gaming experience. Regular cleaning and maintenance will keep your controller in top shape, ensuring hours of uninterrupted gaming pleasure.