
Cleaning poop from a washing machine can be a messy and unpleasant task, but it is important to address the issue promptly to prevent further contamination and unpleasant odors. In this article, we will guide you through the process of effectively cleaning your washing machine after a poop incident, ensuring that it is left clean and hygienic for future use.
Understanding the Nature of the Problem
Before you begin cleaning, it is essential to understand the nature of the problem. Poop in the washing machine can occur due to various reasons, such as accidents or the machine being used to clean soiled clothes or cloth diapers. Identifying the source of contamination is crucial to ensure thorough cleaning.
When poop finds its way into the washing machine, it can create an unpleasant and unhygienic situation. The thought of washing your clothes in a machine that has been contaminated with fecal matter is enough to make anyone cringe. However, understanding the nature of the problem is the first step towards finding a solution.
Identifying the Source of Contamination
Start by assessing if the contamination comes from soiled clothes or if it is due to another issue, such as a clogged drain or a malfunctioning valve. It is important to determine the root cause of the problem to effectively address it. If the contamination is from soiled clothes, it may be necessary to reevaluate your laundry habits or take extra precautions when washing heavily soiled items.
On the other hand, if the contamination is caused by a clogged drain or a malfunctioning valve, it is crucial to fix these issues to prevent future incidents. A clogged drain can lead to water backing up into the drum, carrying with it any contaminants present in the pipes. Similarly, a malfunctioning valve can cause water to flow in the wrong direction, potentially contaminating the machine.
Assessing the Extent of the Mess
Once you have identified the source, assess the extent of the mess. Is the poop confined to the drum, or has it spread to other parts of the machine? Understanding the extent of contamination will help you determine the cleaning approach required.
If the poop is limited to the drum, the cleaning process may be relatively straightforward. However, if it has spread to other parts of the machine, such as the detergent dispenser or the rubber seal around the door, a more thorough cleaning will be necessary. In some cases, disassembling certain components of the washing machine may be required to ensure that all traces of contamination are removed.
It is important to note that cleaning up poop from a washing machine is not a task to be taken lightly. It requires careful attention to detail and a thorough understanding of the machine’s components. Taking the time to properly assess the extent of the mess will help you approach the cleaning process with confidence and ensure that your washing machine is restored to a clean and sanitary condition.
Pre-Cleaning Measures
Before you start cleaning the machine, there are a few pre-cleaning measures you should take to ensure your safety and optimize the cleaning process.
First and foremost, it is crucial to understand the importance of safety precautions when cleaning any machine. Put on a pair of gloves to protect your hands from any potential germs or harmful chemicals that may be present. Additionally, make sure you are working in a well-ventilated area to avoid inhaling any fumes or irritants that may be released during the cleaning process.
Now that you have taken the necessary safety measures, it’s time to gather the cleaning supplies you will need. Having the right tools readily available will enable you to clean efficiently and effectively.
Safety Precautions to Take
Put on a pair of gloves and ensure that you are working in a well-ventilated area. It is important to protect yourself from any potential germs or harmful chemicals that may be present.
Wearing gloves not only safeguards your hands but also prevents the transfer of dirt, oil, or other contaminants from your skin onto the machine. This is especially important if you are dealing with a machine that has been heavily used or if you are cleaning a shared device.
Furthermore, working in a well-ventilated area is essential for your respiratory health. Proper ventilation helps to minimize the inhalation of any cleaning agents or particles that may be released during the cleaning process. If possible, open windows or doors to allow fresh air to circulate and remove any potentially harmful fumes.
Gathering Necessary Cleaning Supplies
Prepare the cleaning supplies you will need. This may include mild detergent, vinegar, baking soda, a soft cloth or sponge, and a toothbrush or small brush for hard-to-reach areas. Having these supplies readily available will enable you to clean efficiently.
Mild detergent is a versatile cleaning agent that can effectively remove dirt, grime, and stains without causing damage to the machine’s surfaces. Vinegar is another useful cleaning solution, particularly for removing mineral deposits or hard water stains. Baking soda, on the other hand, is excellent for tackling tough stains or odors.
When it comes to the cleaning tools, a soft cloth or sponge is ideal for wiping down larger surfaces, while a toothbrush or small brush can reach into crevices and corners that are difficult to clean with larger tools. These smaller brushes are especially useful for removing dust, debris, or any buildup that may have accumulated over time.
By having these cleaning supplies readily available, you can save time and effort by not having to search for them during the cleaning process. This ensures a smooth and uninterrupted cleaning experience, allowing you to focus on restoring the machine to its optimal condition.
Step-by-Step Cleaning Process
Now that you have taken the necessary precautions and gathered the required supplies, it’s time to start the step-by-step cleaning process. Cleaning your washing machine regularly not only ensures its longevity but also maintains the hygiene of your clothes.
Removing Solid Waste
Begin by removing any solid waste present in the drum. This can include lint, small pieces of fabric, or any other debris that may have accumulated over time. Use a gloved hand or disposable tools to carefully scoop out and discard the waste. Take care to avoid spreading it to other parts of the machine.
It’s important to note that removing solid waste from your washing machine helps prevent clogs and ensures that your machine operates efficiently. Neglecting this step can lead to unpleasant odors and potential damage to your machine.
Cleaning the Drum
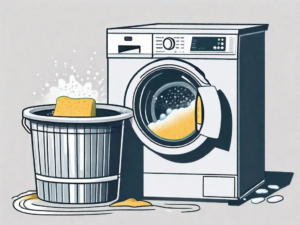
Next, it’s time to clean the drum thoroughly. Fill the detergent drawer with hot water and add a cup of vinegar. Vinegar is a natural cleaning agent that helps remove built-up residue and eliminates any unpleasant odors. Run a hot water cycle without any clothes to clean and sanitize the drum.
While the hot water and vinegar do their magic, take a moment to appreciate the technology behind your washing machine. The drum spins, agitating the water and detergent mixture, ensuring that every inch of the drum is cleaned. This process helps remove dirt, grime, and any remaining traces of detergent or fabric softener.
Once the cycle is complete, open the door and take a deep breath. The fresh scent of cleanliness fills the air. Now, it’s time to wipe the drum with a soft cloth or sponge to remove any remaining residue. Pay attention to the rubber seal around the door as well, as this area can accumulate dirt and grime over time.
Cleaning the Detergent Drawer and Other Parts
Now that the drum is sparkling clean, it’s essential to pay attention to the detergent drawer and other parts of the machine that may have come into contact with the contaminated items. Remove the detergent drawer and soak it in warm soapy water. This helps loosen any dried detergent or fabric softener residue.
While the detergent drawer soaks, take a moment to appreciate the engineering marvel that is your washing machine. The intricate design ensures that the right amount of detergent and water is dispensed, allowing your clothes to be cleaned effectively. The drawer acts as the gateway to cleanliness, ensuring that the cleaning agents are distributed evenly.
After soaking, use a toothbrush or small brush to scrub away any residue from the detergent drawer. Pay close attention to the corners and crevices, as these areas tend to accumulate residue. Rinse the drawer thoroughly and ensure it is completely dry before reinserting it into the machine.
Remember, a clean detergent drawer not only ensures that your clothes are properly cleaned but also prevents any potential clogs or malfunctions in the machine.
Dealing with Stubborn Stains and Odors
If you notice stubborn stains or lingering odors, specific remedies can help address these issues effectively.
When it comes to maintaining a clean and fresh home, dealing with stubborn stains and odors can be quite a challenge. Whether it’s a stain from a spilled glass of red wine or a lingering odor from sweaty gym clothes, it’s important to tackle these issues head-on to ensure a clean and pleasant living environment.
Fortunately, there are various remedies available to help you combat stubborn stains and odors. From natural remedies to commercial products, you have options to choose from based on your preference and the severity of the problem.
Natural Remedies for Stain Removal
One effective natural remedy for stain removal is a simple mixture of baking soda and water. Baking soda, also known as sodium bicarbonate, is a versatile household ingredient that can work wonders on stubborn stains. To use this remedy, create a paste by mixing baking soda with water until you achieve a thick consistency. Apply the paste to the affected area and let it sit for a few minutes to allow the baking soda to penetrate the stain. Afterward, gently scrub the area with a soft brush, working the paste into the fabric or surface. Rinse thoroughly with water and repeat the process if necessary.
In addition to baking soda, other natural stain removal remedies include lemon juice, vinegar, and hydrogen peroxide. Lemon juice, with its acidic properties, can be effective in removing stains from fabrics and surfaces. Vinegar, a common household ingredient, can also help break down stubborn stains, especially those caused by grease or oil. Hydrogen peroxide, a mild bleaching agent, can be used to tackle tough stains on white fabrics. However, it’s important to test these remedies on a small, inconspicuous area first to ensure they don’t cause any damage or discoloration.
Commercial Products for Odor Elimination
While natural remedies can be effective for stain removal, they may not always be sufficient to eliminate stubborn odors. In such cases, it’s worth considering the use of commercial odor elimination products specifically designed for washing machines. These products are formulated to target and neutralize unpleasant smells, leaving your laundry smelling fresh and clean.
When choosing a commercial odor elimination product, look for one that is suitable for your specific needs. Some products are designed to tackle specific types of odors, such as pet odors or cigarette smoke, while others offer a more general odor-neutralizing effect. Follow the instructions provided on the product packaging to ensure you use it correctly and effectively.
In addition to using commercial products, it’s important to maintain good laundry habits to prevent odors from becoming a recurring issue. Make sure to promptly remove wet laundry from the washing machine to prevent mildew growth, and avoid leaving damp clothes sitting in a pile for too long. Proper ventilation in your laundry area can also help prevent the buildup of musty odors.
By being proactive in addressing stubborn stains and odors, you can ensure that your home remains fresh and inviting. Whether you opt for natural remedies or commercial products, the key is to take action and tackle these issues head-on. With the right approach and a little bit of effort, you can say goodbye to stubborn stains and unpleasant odors, and enjoy a clean and pleasant living environment.
Preventive Measures for Future Incidents
Now that you have successfully cleaned your washing machine, it is essential to take preventive measures to avoid future poop incidents.
Tips for Avoiding Cross-Contamination
Separate soiled clothing or cloth diapers from other laundry items to prevent cross-contamination. Washing them separately can help minimize the risk of poop ending up in your washing machine.
Regular Maintenance and Cleaning of Your Washing Machine
Perform regular maintenance and cleaning of your washing machine, even when there is no poop-related incident. Regularly clean the drum, detergent drawer, and other parts of the machine, following manufacturer instructions, to keep it in optimal condition and prevent any avoidable issues.
By following these step-by-step instructions and observing preventive measures, you can effectively clean poop from your washing machine and maintain its cleanliness and hygiene. Remember to prioritize safety, use appropriate cleaning supplies, and consult your machine’s manual for any specific cleaning guidelines or recommendations. With a clean and odor-free washing machine, you can continue to enjoy fresh and clean laundry without any unwanted surprises.