
Flour is a staple ingredient in many recipes, but have you ever wondered if your flour is clean? Cleaning flour is an essential step to ensure the quality and safety of your baked goods. In this step-by-step guide, we will explore why cleaning flour is necessary, the basics of flour cleaning, and provide you with tips for effective flour cleaning. Additionally, we will discuss how to maintain cleanliness in flour storage to keep your flour fresh and safe for use.
Understanding the Need for Cleaning Flour
When it comes to baking, using clean flour is crucial. The quality of your flour directly affects the texture and taste of your baked goods. Clean flour ensures that there are no impurities or contaminants that could compromise the final product. Let’s dive deeper into the importance of clean flour in baking.
The Importance of Clean Flour in Baking
Clean flour plays a vital role in achieving desirable baking results. It helps in creating a smooth and consistent texture, allowing your baked goods to rise properly. Additionally, clean flour ensures that there are no unwanted flavors or odors that could affect the taste of your creations. By using clean flour, you can be confident in the quality and flavor of your baked goods.
When flour is processed, it goes through various stages, including milling, sifting, and packaging. While these processes aim to remove impurities, it is still possible for foreign particles to find their way into the final product. These particles can include dust, debris, or even small rocks. Cleaning flour before using it in your recipes ensures that you have a pure and uncontaminated ingredient to work with.
Another reason to clean flour is to eliminate any potential allergens. Cross-contamination can occur during the production, storage, or transportation of flour. This means that traces of allergens such as nuts or gluten may be present in the flour, even if it is not listed as an ingredient. Cleaning the flour helps to remove any potential allergens, making it safe for individuals with specific dietary needs or allergies.
Risks Associated with Unclean Flour
Using unclean flour can pose various risks to your baked goods and your health. Flour can potentially harbor harmful bacteria or pests such as insects or mites. Consuming contaminated flour may lead to foodborne illnesses. Therefore, it is crucial to clean your flour to eliminate these risks and create a safe baking environment.
One of the most common bacteria found in flour is Salmonella. This bacterium can cause symptoms such as diarrhea, fever, and abdominal cramps. It is usually present in raw flour and can be killed by heat during the baking process. However, if you consume raw dough or batter that contains contaminated flour, you may be at risk of contracting Salmonella. Cleaning your flour before using it reduces the likelihood of bacterial contamination.
In addition to bacteria, flour can also attract pests. Insects like weevils or mites can infest flour if it is not stored properly or if it is exposed to moisture. These pests can contaminate the flour with their waste or eggs, leading to an unpleasant taste and potential health risks. Cleaning the flour by sifting it or using a fine-mesh sieve helps to remove any unwanted visitors, ensuring that your baked goods are pest-free.
Furthermore, unclean flour can affect the overall quality and taste of your baked goods. If there are impurities or contaminants present, they can alter the texture, color, and flavor of the final product. Your baked goods may turn out dense, gritty, or have an off-putting taste. By taking the time to clean your flour, you can ensure that your recipes turn out as intended, with a delightful texture and delicious flavor.
In conclusion, clean flour is essential for successful baking. It provides a foundation for achieving the desired texture, taste, and quality in your baked goods. By understanding the importance of clean flour and the risks associated with unclean flour, you can take the necessary steps to ensure that your baking endeavors are both safe and enjoyable.
The Basics of Flour Cleaning
Before we dive into the step-by-step process of cleaning flour, let’s go over the essential tools required and how to prepare your workspace for an effective cleaning session.
When it comes to baking, using clean and high-quality flour is essential for achieving the best results. Flour cleaning is a process that helps remove impurities such as dirt, debris, and unwanted particles from the flour, ensuring its purity and enhancing its overall quality.
Tools Required for Flour Cleaning
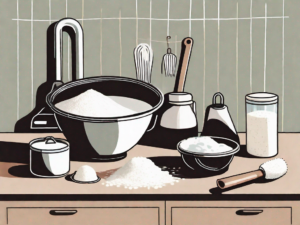
To clean your flour effectively, you will need a few essential tools. These include a fine-mesh sieve or flour sifter, a clean kitchen towel or cheesecloth, and a large bowl or container for washing and drying the flour. Each of these tools plays a crucial role in the cleaning process.
The fine-mesh sieve or flour sifter is used to separate the flour particles from any larger impurities. It helps to aerate the flour and break up any clumps, ensuring a smooth and even texture. The clean kitchen towel or cheesecloth is used to further filter the flour, removing any remaining impurities that may have passed through the sieve or sifter.
The large bowl or container is where the flour is washed and dried. It should be clean and dry before use to prevent any contamination. Make sure to have these tools readily available before you start cleaning your flour.
Preparing Your Workspace
Creating a clean and organized workspace is crucial for efficient flour cleaning. Before you begin, take a moment to clear your work surface of any unnecessary items. This will provide you with ample space to work and prevent any accidental spills or mix-ups.
Next, ensure that your tools and ingredients are easily accessible. Arrange them in a neat and orderly manner, so you can reach for them without any hassle during the cleaning process. Having everything within reach will save you time and make the process more efficient.
It’s also a good idea to wash your hands thoroughly before handling the flour. This simple step helps prevent any potential contamination and ensures that the flour remains clean and safe for consumption. Use warm water and soap, and make sure to dry your hands properly before proceeding.
By following these steps and preparing your workspace properly, you are setting yourself up for a successful flour cleaning session. With the right tools and a clean environment, you can ensure that your flour is free from impurities and ready to be used in your favorite recipes.
Step-by-Step Guide to Cleaning Flour
Now that you’re familiar with the basics of flour cleaning, let’s dive into the step-by-step process. Follow these instructions to achieve clean and high-quality flour for your baking needs.
Initial Sorting and Sifting
Begin by visually inspecting your flour for any visible impurities such as dirt, debris, or small insects. It’s important to ensure that the flour you use is free from any contaminants that could affect the taste and quality of your baked goods. Remove any foreign objects you come across, taking care to maintain the integrity of the flour.
Once you’ve completed this initial sorting, it’s time to sift your flour using a fine-mesh sieve or flour sifter. Sifting helps break up clumps and aerate the flour, ensuring a more consistent texture. It also helps to remove any remaining impurities that may have been missed during the visual inspection.
Gently tap or shake the sieve or sifter to allow the flour to pass through while leaving behind any larger particles or clumps. This process will result in a smoother and lighter flour, perfect for achieving the desired texture in your baked goods.
Washing and Drying Process
After sifting, transfer the flour to a large bowl or container. Fill it with clean water, making sure the water level is higher than the flour. The water will act as a medium to carry away any remaining impurities that may still be present in the flour.
Gently agitate the flour in the water using your hands, allowing any impurities to loosen and float to the surface. This step is crucial in ensuring that the flour is thoroughly cleaned and free from any unwanted substances. Take your time and be thorough in this process to achieve the best results.
Carefully pour out the water, taking care not to pour out any of the flour. You can use a fine-mesh sieve or a colander with small holes to prevent any accidental loss of flour. The impurities will be carried away with the water, leaving you with cleaner flour.
Repeat this washing process two to three times until the water runs clear and free from impurities. This will ensure that all the remaining contaminants are removed, leaving you with flour that is as pure as possible.
Once the flour is clean, spread it out onto a clean kitchen towel or cheesecloth to dry. Allow the flour to air dry completely before moving on to the next step. This drying process is important to prevent any moisture from remaining in the flour, which could lead to clumping or spoilage.
Final Sifting and Storage
Once the flour is fully dried, sift it once again using a fine-mesh sieve or flour sifter. This final sifting ensures that any remaining clumps or impurities are removed, resulting in a smooth and clean flour. It also helps to aerate the flour, giving it a lighter texture.
Transfer the clean flour into an airtight container or storage bag to maintain its freshness. It’s important to store the flour in a cool, dry place away from direct sunlight to prevent it from absorbing any moisture or odors. Proper storage will help extend the shelf life of your clean flour, allowing you to enjoy its quality for a longer period of time.
Remember, cleaning flour is an essential step in ensuring the quality and taste of your baked goods. By following these step-by-step instructions, you can confidently use clean and high-quality flour in your recipes, resulting in delicious and satisfying treats every time.
Tips for Effective Flour Cleaning
Cleaning flour can be a delicate process, but with these tips, you can ensure effective cleaning and maximize the quality of your flour.
Avoiding Common Mistakes
When cleaning flour, it’s important to avoid certain mistakes that can compromise the process. Ensure that your work surface, tools, and hands are clean to prevent cross-contamination. Additionally, make sure to thoroughly dry the flour to prevent mold or moisture-related issues during storage.
Maximizing Flour Freshness and Quality
To maintain the freshness and quality of your cleaned flour, store it in a cool and dry place away from direct sunlight. It’s also recommended to use the cleaned flour within a reasonable timeframe to ensure optimal results.
Maintaining Cleanliness in Flour Storage
As important as cleaning flour is, maintaining cleanliness in flour storage is equally crucial. Follow these best practices to keep your flour fresh and free from contaminants.
Best Practices for Flour Storage
Store your clean flour in airtight containers or resealable bags to prevent moisture and pests from reaching the flour. Label the containers with the date of cleaning to keep track of its freshness. Additionally, regularly clean and sanitize your storage containers to avoid any accumulation of bacteria or contaminants.
Signs Your Flour May Need Cleaning Again
Flour may need cleaning again if you notice any unusual odor, discoloration, or presence of insects or pests. If you’re unsure about the quality of your flour, it’s best to err on the side of caution and repeat the cleaning process.
Conclusion
Cleaning flour is an important step in baking, guaranteeing the quality, safety, and taste of your creations. By understanding the need for clean flour, mastering the basics of flour cleaning, and implementing effective tips and storage practices, you can ensure that your flour is free from impurities and ready to elevate your baking endeavors to new heights.