
Cleaning your wool pressing mat regularly is essential to maintain its quality and prolong its lifespan. By understanding the importance of regular cleaning and following the correct steps, you can ensure that your mat remains in optimal condition.
Understanding the Importance of Regular Cleaning
Before delving into the cleaning process, it’s crucial to comprehend why your wool pressing mat needs regular cleaning. Wool pressing mats are used extensively for ironing, and this frequent use leads to the accumulation of dirt, dust, and fabric residue on the surface. Over time, these particles can affect the performance of the mat, causing it to become less effective in transferring heat and steam to your fabrics.
Regular cleaning of your wool pressing mat is essential for several reasons. Firstly, when fabrics are pressed onto the mat, fibers, lint, and other debris can be transferred onto the wool. This buildup can create an uneven surface, impacting the quality of your ironing results. The presence of these particles can also affect the overall appearance of your fabrics, leaving behind unwanted marks or stains.
Furthermore, the absorbed particles can accumulate moisture and even promote the growth of bacteria or mold if left unattended. This not only poses a health risk but can also lead to unpleasant odors emanating from the mat. By regularly cleaning your wool pressing mat, you can eliminate these potential hazards and ensure a hygienic ironing experience.
Why Your Wool Pressing Mat Needs Cleaning
Now that you understand the importance of regular cleaning, let’s delve deeper into why your wool pressing mat specifically requires cleaning. As mentioned earlier, the frequent use of the mat leads to the accumulation of dirt, dust, and fabric residue. These particles can embed themselves into the wool fibers, making it difficult for the mat to effectively transfer heat and steam to your fabrics.
Additionally, the buildup of fibers, lint, and debris can create an uneven surface on the mat. This unevenness can cause your fabrics to wrinkle or crease in unintended ways, compromising the quality of your ironing. By cleaning your wool pressing mat regularly, you can ensure a smooth and even surface, allowing for precise and professional ironing results.
The Impact of Neglecting Regular Cleaning
Neglecting regular cleaning can have detrimental effects on your wool pressing mat. Not only can it compromise the effectiveness of the mat, but it can also lead to discoloration, odor, and even damage the wool fibers. The accumulation of dirt, dust, and fabric residue can cause the mat to lose its natural color and vibrancy, resulting in a dull and worn-out appearance.
Furthermore, the absorbed particles can trap moisture, creating a damp environment that promotes the growth of bacteria or mold. This can lead to unpleasant odors emanating from the mat, making your ironing experience less enjoyable. Moreover, if left unattended, the moisture and bacteria can damage the wool fibers, causing them to weaken or break over time.
By committing to a regular cleaning routine, you can prevent these issues and maintain the longevity of your mat. Regular cleaning not only ensures optimal performance but also preserves the aesthetic appeal and functionality of your wool pressing mat. So, make it a habit to clean your mat regularly to enjoy efficient and effective ironing for years to come.
Gathering Your Cleaning Supplies
Before you can begin the cleaning process, you’ll need to gather your cleaning supplies. Proper equipment and cleaning products ensure the best results and avoid any potential damage to your wool pressing mat.
When it comes to cleaning your wool pressing mat, it’s important to have the right tools at your disposal. The following paragraphs will provide you with a comprehensive list of essential items that will make your cleaning process a breeze.
Essential Items for Cleaning Your Mat
To clean your wool pressing mat, you’ll need the following:
- A clean, lint-free cloth or sponge
- Mild detergent or commercial wool cleaning solution
- Lukewarm water
- A soft-bristle brush or toothbrush
Let’s take a closer look at each of these items:
A clean, lint-free cloth or sponge: This is an essential tool for removing any dirt or debris from your wool pressing mat. Make sure it is clean and free from any lint that could potentially transfer onto the mat.
Mild detergent or commercial wool cleaning solution: When it comes to cleaning your wool pressing mat, it’s important to use a cleaning solution that is specifically designed for wool. Opt for mild options that are gentle on the delicate fibers of the mat. If you prefer commercial cleaning solutions, make sure to choose one that is suitable for wool fabrics.
Lukewarm water: Lukewarm water is the ideal temperature for cleaning your wool pressing mat. It helps to dissolve any dirt or stains without causing any damage to the fibers. Avoid using hot water, as it can shrink or distort the mat.
A soft-bristle brush or toothbrush: This tool is useful for gently scrubbing any stubborn stains or spots on your wool pressing mat. Make sure the bristles are soft to avoid damaging the fibers. Alternatively, you can use a toothbrush with soft bristles for more precise cleaning.
Choosing the Right Cleaning Products
When selecting a cleaning solution for your wool pressing mat, it’s important to choose wisely. Opt for mild options specifically designed for wool fabrics. These products are formulated to effectively clean without causing any damage or discoloration to the fibers.
Avoid using harsh chemicals or bleach, as they can be too harsh for the delicate nature of wool. These substances can weaken the fibers and cause them to break or become discolored. Always read the product labels carefully and follow the instructions provided to ensure the best results.
By using the right cleaning products and tools, you can ensure that your wool pressing mat remains in top condition for years to come. Taking the time to gather the necessary supplies and choosing the right cleaning solutions will help you achieve the best results while preserving the integrity of your mat.
Pre-Cleaning Steps for Your Wool Pressing Mat
Before diving into the detailed cleaning process, there are a few pre-cleaning steps that you should follow to ensure successful results.
Inspecting Your Mat for Damage
Take a moment to carefully inspect your wool pressing mat for any visible damage or stains. This step is crucial as it will help you determine the extent of cleaning required. Look closely for any tears, holes, or discoloration that may have occurred over time. It’s important to address these issues before proceeding with the cleaning process to prevent further damage.
If you notice any small stains on your wool pressing mat, don’t worry. Most stains can be removed during the cleaning process. However, larger or more stubborn stains may require professional assistance. In such cases, it’s best to consult a specialist who can provide the necessary expertise to restore your mat to its original condition.
Preparing Your Mat for Cleaning
Prior to cleaning, it’s essential to prepare your wool pressing mat to ensure effective and efficient cleaning. Start by finding a clean, flat surface where you can place your mat. This will provide stability and prevent any unnecessary movement during the cleaning process.
Once your mat is in position, consider lightly misting the surface with water. This simple step can help loosen any embedded debris or fibers, making the cleaning process more effective. The water acts as a natural solvent, breaking down dirt particles and making them easier to remove. However, be careful not to oversaturate the mat, as excessive moisture can damage the wool fibers.
By misting the surface, you are also hydrating the wool fibers, which can help restore their natural shape and resilience. Over time, wool fibers can become compressed and lose their loftiness. The moisture from the misting process will help the fibers regain their original fluffiness, ensuring optimal performance when pressing your fabrics.
Following these pre-cleaning steps will set the foundation for a successful cleaning process. By inspecting your mat for damage and preparing it properly, you can ensure that your wool pressing mat remains in excellent condition for years to come.
Detailed Cleaning Process
Now that you’ve prepared your wool pressing mat, it’s time to dive into the detailed cleaning process.
Before we begin, it’s important to understand why proper cleaning of your wool pressing mat is essential. Over time, dust, dirt, and stains can accumulate on the surface, affecting its performance and longevity. By following these steps, you’ll ensure that your mat remains in pristine condition, allowing for smooth and efficient pressing of your fabrics.
Applying the Cleaning Solution
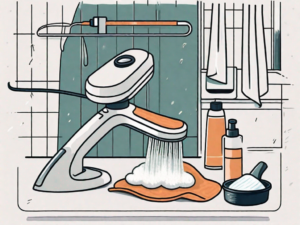
First, let’s gather the necessary supplies. You’ll need a mild detergent or a commercial wool cleaning solution, lukewarm water, a small container, a clean cloth or sponge, and a soft-bristle brush or toothbrush.
Dilute the mild detergent or commercial wool cleaning solution with lukewarm water in a small container. It’s important to use lukewarm water as hot water can cause the wool fibers to shrink or felt. Gently dip your clean cloth or sponge into the solution, ensuring it is damp but not saturated.
Now, let’s focus on the affected areas of your wool pressing mat. Begin by blotting these areas with the damp cloth or sponge, applying moderate pressure to lift any dirt or stains. Take your time and be thorough, ensuring that you cover the entire surface of the mat.
Proper Techniques for Scrubbing and Rinsing
After applying the cleaning solution and removing the initial dirt and stains, it’s time to tackle any stubborn areas. Take your soft-bristle brush or toothbrush and gently scrub the surface of the mat in a circular motion. This technique helps to dislodge any remaining debris and stains without causing damage to the delicate wool fibers.
Focus on areas that require extra attention, such as those with deep stains or debris. However, it’s important to note that excessive force can harm the wool fibers, so be gentle yet thorough in your scrubbing technique.
Once you have thoroughly scrubbed the mat, it’s time to rinse it under lukewarm water. This step is crucial to remove any remaining cleaning solution and ensure that no residue is left behind. Hold the mat under running water, making sure to rinse all areas, including corners and edges.
Take your time during the rinsing process, ensuring that all traces of the cleaning solution are removed. This will help maintain the integrity of the wool fibers and prevent any potential damage that may occur if the solution is left on the mat.
Now that you’ve completed the detailed cleaning process, it’s time to move on to the next step – drying your wool pressing mat.
Drying and Storing Your Wool Pressing Mat
After completing the cleaning process, it’s essential to properly dry and store your wool pressing mat to maintain its quality and prevent any potential damage.
Effective Drying Techniques
To dry your wool pressing mat, place it flat on a clean towel or absorbent surface. Avoid exposing it to direct sunlight or excessive heat, as this can cause shrinkage or distortion. Allow the mat to air dry naturally, periodically flipping it over to ensure even drying.
Tips for Storing Your Clean Mat
Once your wool pressing mat is completely dry, it’s time to store it properly. Roll your mat gently and secure it with a clean, breathable fabric to prevent dust accumulation. Avoid storing the mat in plastic bags or airtight containers, as this can trap moisture and promote the growth of mold or mildew.
By following these step-by-step instructions, you can effectively clean and maintain your wool pressing mat. Regular cleaning will not only improve the performance of your mat but also ensure that it remains in optimal condition for years to come.