

The Pax 3 vaporizer is a popular choice among vaping enthusiasts for its sleek design and impressive performance. However, like any other device, regular cleaning is essential.
In this article, we will guide you through the step-by-step process of how to clean a Pax 3 vaporizer, ensuring that you can continue enjoying the purest and most flavorful vaping experience.
The Importance of Cleaning a Pax 3 Vaporizer
Regular cleaning of your Pax 3 vaporizer is crucial for several reasons.
- Firstly, it helps to maintain the optimal performance of the device. Over time, residue from vaping materials can accumulate and affect the vaporizer’s efficiency.
- Secondly, thorough cleaning ensures that you eliminate any buildup of bacteria or contaminants, ensuring a more hygienic vaping experience.
- Lastly, regular cleaning is essential for maximizing the lifespan of your Pax 3 vaporizer, as it prevents any potential damage that may be caused by neglecting maintenance.
Gathering the Necessary Cleaning Supplies & Tools
Before you begin cleaning your Pax 3 vaporizer, it’s important to gather all the necessary cleaning supplies.
The following are crucial for a detailed cleaning of a Pax 3 vaporizer
- Isopropyl alcohol (Versatile & leaves no residue)
- Cotton swabs or Q-tips
- Small cleaning brush or toothbrush
- Soft cloth or microfiber cloth
Having these supplies ready will make the cleaning process much easier and more effective.
Disassembling Your Pax 3 Vaporizer
Before you begin cleaning, it’s important to disassemble your Pax 3 vaporizer. Here are the steps for each component:
Removing the Mouthpiece of the Pax 3 Vaporizer
The first step is to remove the mouthpiece from your Pax 3.
- Gently twist and pull it away from the device, being careful not to use excessive force. The mouthpiece is designed to fit securely, so a gentle yet firm grip should be enough to detach it.
Once the mouthpiece is removed, set it aside for cleaning later on.
Detaching the Oven Lid of the Pax 3 Vaporizer
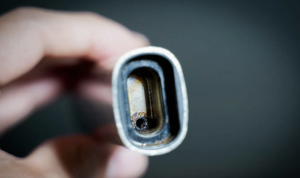
Next, detach the oven lid from the vaporizer. The oven lid is where you place your dry herb or concentrate for vaping.
- To detach the oven lid, gently pry it open with your fingers or a small tool screwdriver. Be careful not to apply too much force, as this may cause damage to the lid or the vaporizer itself.
After cleaning the oven lid, inspect it for any signs of wear or damage.
Over time, the constant heating and cooling of the lid can cause it to become less effective or even break. If you notice any cracks, chips, or other damage, it may be time to replace the oven lid.
You can find a replacement oven lid here
How To Clean A Pax 3 Vaporizer: Step By Step
Now that you have disassembled your Pax 3 vaporizer, it’s time to clean each part thoroughly.
Follow these steps to ensure a pristine vaping experience:
1: Cleaning the Oven and Vapor Path
The oven and vapor path are crucial components of your Pax 3 vaporizer. To clean them effectively, follow these steps:
- Use a cotton swab or q-tip soaked in isopropyl alcohol to gently clean the oven and remove any residue.
- Repeat the process with a clean cotton swab until all residue is removed.
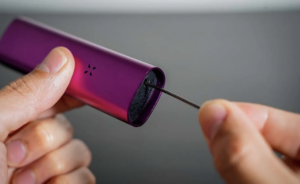
- For the vapor path, use a cotton swab soaked in isopropyl alcohol and gently clean the inside of the path.
2: Cleaning the Pax 3 Mouthpiece
The mouthpiece of your Pax 3 needs regular cleaning to ensure the best vaping experience. Here’s how to clean it:
- Soak the mouthpiece in isopropyl alcohol for a few minutes to remove any residue.
- Gently scrub the mouthpiece with a small cleaning brush or toothbrush to remove any stubborn residue.
- Rinse the mouthpiece thoroughly with warm water to remove any remaining alcohol.
- Allow the mouthpiece to dry completely before reattaching it to the vaporizer.
3: Cleaning the Pax 3 Oven Lid
Keeping the oven lid clean is essential for optimal vaporization. Here’s how to clean it:
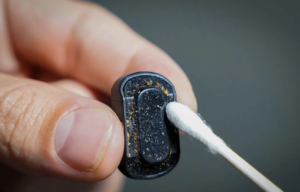
- Using a cotton swab or q-tip soaked in isopropyl alcohol, gently clean the inside and outside of the oven lid.
- Ensure that no residue or debris is left behind.
How To Reassemble to Pax 3 Vaporizer
Now that you have thoroughly cleaned all the parts of your Pax 3 vaporizer, it’s time to reassemble them. Follow these steps:
1: Putting the Pieces Back Together
- Begin by reattaching the oven lid to the vaporizer. Ensure that it fits securely and is properly aligned.
- Next, slide the mouthpiece back into place, making sure it is firmly attached.
Once all the parts are correctly reassembled, your Pax 3 vaporizer is ready for use.
2: Checking for Proper Functionality
After reassembling your Pax 3 vaporizer, it’s important to check for proper functionality.
- Turn on the vaporizer and check that it heats up as expected. Take a few test draws to ensure that the vapor production is consistent and that there are no unusual tastes or smells.
If everything is working correctly, your Pax 3 vaporizer is now clean and ready to provide you with an optimal vaping experience.
Conclusion: How to Clean a Pax 3 Vaporizer
Cleaning your Pax 3 vaporizer regularly is an investment in its longevity and performance.
By following the step-by-step process outlined in this article, you can ensure that your vaporizer remains in top condition and delivers exceptional vaping experiences every time.
Remember, thorough cleaning and proper maintenance will help you get the most out of your Pax 3 vaporizer for years to come.