
Cleaning your Camelbak Eddy bottle is an essential step in maintaining its performance and ensuring the safety of your drinking water.
By regularly cleaning your bottle, you can remove dirt, bacteria, and odors, preventing them from affecting the taste and quality of your water.
In this article, we will guide you through the process of cleaning your Camelbak Eddy bottle, step by step.
Gathering Your Cleaning Supplies
When it comes to cleaning your Camelbak Eddy bottle, it’s important to have the right supplies on hand.
Let’s take a closer look at the essential items you’ll need for the cleaning process.
Essential Items for Cleaning
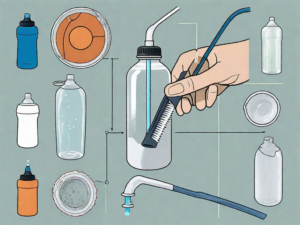
To clean your Camelbak Eddy bottle, you will need the following items:
- A bottle brush with soft bristles
- Warm water
- Dish soap or a Camelbak cleaning solution (Here’s our favorite!)
Having a bottle brush with soft bristles is crucial for effectively removing any dirt or residue that may have accumulated inside your Camelbak Eddy bottle.
Warm water is another essential item for cleaning your Camelbak Eddy bottle. It helps to loosen any dirt or grime, making it easier to remove during the cleaning process.
When it comes to choosing a cleaning solution, you have a couple of options.
You can use mild dish soap, which is readily available in most households. Dish soap effectively removes dirt and bacteria without causing any damage to the plastic of the bottle.
Alternatively, Camelbak offers a range of cleaning solutions that are specifically designed for their bottles.
These solutions are formulated to provide a thorough clean while being gentle on the materials used in the bottle’s construction.
How To Clean a Camelbak Eddy Step-by-Step Process
Now that you have gathered your cleaning supplies, let’s walk through the step-by-step process of cleaning your Camelbak Eddy bottle.
1: Preparing a Camelbak Eddy for Cleaning
Before starting the cleaning process, disassemble your Camelbak Eddy bottle.
- Remove the straw and bite valve from the cap, and separate the bottle body and the cap. This will make it easier to clean each component thoroughly.
- Once the bottle is disassembled, take a moment to inspect each part for any signs of wear and tear. If you notice any issues, it may be time to replace these components
- Next, rinse each part with warm water to remove any loose debris. This step is particularly important if you have been using your water bottle for outdoor activities or sports, as dirt and grime can accumulate over time.
2: Cleaning the Body of the Bottle of a Camelbak Eddy
- Using a bottle brush with soft bristles, scrub the interior of the bottle body. Make sure to reach all the corners and crevices to remove any residue or stains.
- If you notice stubborn stains or odors that are difficult to remove, you can create a simple cleaning solution by mixing equal parts of water and white vinegar.
- Fill the bottle halfway with the solution, close the cap tightly, and shake vigorously. Let it sit for a few minutes before rinsing it thoroughly with warm water.
- Rinse the bottle body with warm water to remove any residual soap or debris. Ensure that there are no traces of cleaning solution left behind, as they can affect the taste of your water.
3: Cleaning the Straw and Bite Valve of a Camelbak Eddy
- Place the straw and bite valve in a small bowl filled with warm water and a few drops of dish soap or Camelbak cleaning solution. Let them soak for a few minutes to loosen any dirt or buildup.
- While the straw and bite valve are soaking, take this opportunity to clean the cap of your Camelbak Eddy bottle. Use a sponge or cloth soaked in soapy water to wipe the inside and outside of the cap.
- Pay attention to the threads and the underside of the cap, as these areas can accumulate dirt and bacteria.
- After soaking, scrub the straw and bite valve with a bottle brush, paying attention to any hard-to-reach areas.
- Gently run the brush through the straw to dislodge any trapped particles. Rinse them thoroughly with warm water to remove any soap residue.
Once all the components are clean and rinsed, allow them to air dry completely before reassembling your Camelbak Eddy bottle. This step is crucial to prevent the growth of mold or mildew.
4: Drying and Storing Your Camelbak Eddy
Once you have cleaned all the components of your Camelbak Eddy bottle, it’s time to dry and store them properly.
Proper Drying Techniques
After rinsing each component, shake off any excess water. To ensure complete drying, let all parts air dry completely before reassembling your Camelbak Eddy bottle.
Placing the bottle upside down on a dish rack or towel will facilitate ventilation and quick drying.
Ideal Storage Conditions
To maintain the cleanliness of your Camelbak Eddy bottle, store it in a cool, dry place away from direct sunlight.
Storing the bottle with the cap off allows airflow and prevents any residual moisture from becoming a breeding ground for bacteria.
By following these cleaning guidelines, you can enjoy fresh and clean drinking water from your Camelbak Eddy bottle every time.
Regular cleaning not only ensures your health and safety but also extends the lifespan of your bottle, allowing you to stay hydrated on all your adventures.