
In the world of horse riding, a clean and well-maintained horse bit is essential for both the comfort of the horse and the safety of the rider. A rusty bit not only looks unsightly but can also result in discomfort and even injury to the horse. Therefore, regular cleaning and maintenance of your horse bit is crucial in ensuring its longevity and performance.
Understanding the Importance of a Clean Horse Bit
Before delving into the process of cleaning a rusty horse bit, it’s important to understand the vital role that a horse bit plays in horse riding. A horse bit is a fundamental piece of tack that connects to the bridle and serves as a means of communication between the rider and the horse.
A clean horse bit not only enhances communication but also ensures the horse’s comfort. Rust, on the other hand, compromises the effectiveness of the bit and can lead to discomfort and resistance from the horse.
The Role of a Horse Bit
At its core, a horse bit is designed to transmit signals from the rider’s hands to the horse’s mouth. It helps the rider communicate commands such as turning, stopping, and slowing down. A clean bit allows for effective communication, resulting in a smoother and more enjoyable riding experience.
When a rider applies pressure on the reins, the bit exerts pressure on the horse’s tongue, bars, and corners of the mouth. This pressure, when properly applied, signals the horse to respond accordingly. For example, a gentle squeeze on the reins may prompt the horse to slow down, while a firmer pull may indicate the need to stop.
Additionally, horse bits come in various designs, each serving a specific purpose. For instance, a snaffle bit is commonly used for basic communication and is suitable for beginner riders. On the other hand, a curb bit provides more leverage and is often used by experienced riders for advanced maneuvers.
Risks of a Rusty Bit
A rusty bit poses numerous risks to both the horse and the rider. Firstly, rust can create rough surfaces on the bit, which can lead to discomfort and pain for the horse as it moves and responds to the rider’s commands.
When a rusty bit is placed in the horse’s mouth, the rough surfaces can cause irritation and even small cuts. This can make the horse resistant to the bit, resulting in a breakdown of communication between horse and rider. The horse may become unresponsive or exhibit signs of discomfort, such as tossing its head or opening its mouth excessively.
Furthermore, rust compromises the structural integrity of the bit, making it weaker and more prone to breakage. A broken bit not only puts the rider at risk of losing control but also poses a danger to the horse, potentially leading to accidents and injuries.
Regular cleaning and maintenance of the horse bit is essential to prevent rust and ensure its longevity. By keeping the bit clean and free from rust, riders can maintain effective communication with their horses and promote a safe and comfortable riding experience for both horse and rider.
Identifying Rust on Your Horse Bit
Before proceeding with the cleaning process, it’s crucial to identify whether your horse bit is indeed rusty. Here are some common signs to look out for:
Common Signs of Rust
- Discoloration: Rust often appears as reddish-brown spots or stains on the surface of the bit.
- Texture: When running your fingers along the bit, you may notice rough patches or areas of elevated corrosion.
- Odor: Rust can sometimes emit a distinct metallic smell.
If you notice any of these signs, it’s time to take action and give your horse bit the cleaning it deserves.
Assessing the Level of Rust Damage
Not all rust damage is equal. Depending on the severity, some bits may require a simple cleaning, while others may need more intensive restoration. Assessing the level of rust damage helps determine the appropriate cleaning approach.
Minor surface rust can generally be resolved through regular cleaning methods. However, if the rust has progressed significantly, you may need to consider seeking professional assistance or even replacing the bit.
When assessing the level of rust damage, it’s essential to consider the material of the horse bit. Different materials may react differently to rust and require specific cleaning techniques. For example, stainless steel bits are more resistant to rust compared to iron or copper bits. Therefore, a stainless steel bit with minor rust damage may only require a gentle cleaning, while an iron bit with the same level of rust may need more extensive restoration.
Furthermore, it’s important to note that rust not only affects the appearance of the horse bit but also its functionality. Rust can compromise the structural integrity of the bit, making it less effective and potentially harmful to your horse’s mouth. Therefore, regular inspections and maintenance are crucial to ensure the safety and comfort of your horse.
When cleaning a rusty horse bit, it’s recommended to use specialized cleaning products designed specifically for removing rust. These products are formulated to dissolve rust and restore the bit’s original shine. Additionally, using a soft brush or cloth can help remove stubborn rust spots without causing any damage to the bit’s surface.
After cleaning the bit, it’s important to thoroughly rinse it with clean water to remove any residue from the cleaning products. Leaving any cleaning product residue on the bit can potentially irritate your horse’s mouth and cause discomfort. Once rinsed, make sure to dry the bit thoroughly before reattaching it to the bridle.
Remember, prevention is key when it comes to rust on horse bits. Regularly inspecting and cleaning your horse’s bit can help prevent rust from forming in the first place. Additionally, storing the bit in a dry and well-ventilated area can also help minimize the risk of rust development.
By taking proper care of your horse bit and addressing rust issues promptly, you can ensure the longevity and effectiveness of the bit, providing your horse with a comfortable and safe riding experience.
Gathering the Necessary Cleaning Supplies
Once you’ve identified the presence of rust and assessed the level of damage, the next step is to gather the necessary cleaning supplies. Here’s what you’ll need:
Choosing the Right Cleaning Agents
When it comes to cleaning a horse bit, it’s important to choose the right cleaning agents. Using a gentle soap or dishwashing detergent that is free of abrasive particles is ideal. Harsh chemicals or products that may be harmful to your horse should be avoided at all costs. The last thing you want is to cause any discomfort or irritation to your horse while cleaning their bit.
One effective cleaning agent for stubborn rust spots is white vinegar. With its acidic properties, vinegar can break down the corrosion and make it easier to remove. It’s a natural and safe option that can be found in most households, making it a convenient choice for bit cleaning.
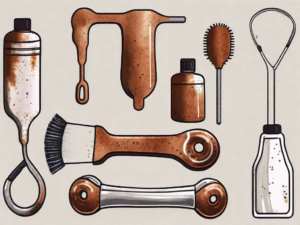
Essential Tools for Bit Cleaning
Having the right tools for cleaning your horse bit is essential to ensure a thorough and effective cleaning process. Here are some essential tools you’ll need:
- Toothbrush or Soft Bristle Brush: A toothbrush or soft bristle brush is perfect for scrubbing away surface rust without damaging the bit. The bristles should be soft enough to prevent any scratches or damage to the metal, while still being able to remove the rust effectively. It’s important to choose a brush that is specifically designated for bit cleaning to avoid any cross-contamination with other cleaning tasks.
- Bucket or Basin: Fill a bucket or basin with warm water to rinse off the cleaning agents and remove dirt and debris. The warm water helps to loosen any remaining rust particles and ensures a thorough cleaning. Make sure the bucket or basin is large enough to comfortably fit the bit and allow for easy maneuvering during the cleaning process.
- Clean Cloth or Towel: After cleaning the bit, it’s important to dry it thoroughly to prevent any further rusting. A clean cloth or towel can be used to gently pat the bit dry. Avoid using rough or abrasive materials that may scratch the metal surface. It’s also a good idea to have a designated cloth or towel for bit cleaning to avoid any potential cross-contamination.
By gathering these necessary cleaning supplies and tools, you’ll be well-prepared to tackle the rust on your horse bit and restore it to its former glory. Remember to always prioritize the safety and comfort of your horse during the cleaning process, and take your time to ensure a thorough cleaning job.
Preparing Your Work Area
Before starting the cleaning process, it’s essential to prepare your work area to ensure a safe and efficient experience. Here are a few things to consider:
Safety Measures to Consider
Choose a well-ventilated area with sufficient lighting to allow for clear visibility. It’s also advisable to wear protective gloves to shield your hands from any cleaning agents or rust particles.
Setting Up for Efficient Cleaning
Place your horse bit on a clean towel or soft surface to protect it from scratching during the cleaning process. Ensure easy access to your cleaning supplies, such as the bucket of warm water and the cleaning agents.
The Cleaning Process: Step-by-Step
Now that you’re fully prepared, it’s time to bring your rusty horse bit back to its former glory. Follow these step-by-step instructions:
Initial Rinse and Scrub
Begin by rinsing the horse bit with warm water. This helps remove any loose dirt and prepares the surface for cleaning. Using a toothbrush or soft bristle brush, gently scrub away any visible rust spots. Take your time to ensure thorough cleaning.
Applying the Cleaning Agent
Once the bit is rinsed and scrubbed, it’s time to apply the cleaning agent. Mix a small amount of mild soap or dishwashing detergent with warm water to create a soapy solution. Dip the brush into the solution and scrub the bit, paying close attention to areas with rust. For stubborn rust spots, lightly saturate a cloth with white vinegar and apply it to the affected areas.
Detailed Scrubbing and Rinsing
Gently scrub the bit in a circular motion, working your way around the entire surface. Pay special attention to crevices and hard-to-reach areas where rust tends to accumulate. Once you’re satisfied with the cleaning, thoroughly rinse the bit with warm water. Ensure that all traces of cleaning agents and rust are removed.
After the final rinse, dry the bit using a clean cloth or towel. Ensure that it is completely dry before storing it to prevent future rust formation.
By following this step-by-step guide, you can effectively clean your rusty horse bit, restoring its functionality and prolonging its lifespan. Regular maintenance and cleaning will ensure a comfortable and safe riding experience for both you and your horse.